Jeder kennt die alternative Firmware Tasmota, welche meistens für die Sonoff-Module verwendet wird. Ich habe schon oft drüber geschrieben, siehe hier und hier.
Wenn man nun Tasmota auf einem WeMos D1 aufspielt und anschließend als Device „generic“ wählt, erscheint im Webinterface auch nichts spektakuläres. Ein- Ausschalten und Helligkeit der Stripes, und das wars.

Etwas Schwung kommt in das Projekt, wenn man sich die Doku von Tasmota studiert. Hier sieht man das man in der Tasmota Konsole durch einige Kommandos viel machen kann.
Beispiele:
- Nachtlicht
- Verschiedene definierbare Lichtfarben
- Wake-up light
- verschiedene Dimmer
- Uhr
und verschiedene Muster und Animationen
Ich habe mal einiges aus der Doku rauskopiert:
WS2812 Led string specific (doku: Tasmota)
| Command | Payload | Description |
|---|---|---|
| Color | <red>,<green>,<blue> | Set color to decimal values |
| Color | #RRGGBB | (WS2812x) Set Color to hexadecimal value |
| Color | #RRGGBBWW | (SK6812) Set Color to hexadecimal value |
| Color2 | #<value> | Set color to hexadecimal value but adjust to current Dimmer value |
| Color3 | Show current seconds clock hand color setting as RRGGBB | |
| Color3 | <RRGGBB> | Set seconds clock hand color to RRGGBB hexadecimal value |
| Color4 | Show current minutes clock hand color setting as RRGGBB | |
| Color4 | <RRGGBB> | Set minutes clock hand color to RRGGBB hexadecimal value |
| Color5 | Show current hour clock hand color setting as RRGGBB | |
| Color5 | <RRGGBB> | Set hour clock hand color to RRGGBB hexadecimal value |
| Color6 | Show current marker color setting as RRGGBB | |
| Color6 | <RRGGBB> | Set marker color to RRGGBB hexadecimal value |
| Led1..Led<count> | Show specific led current color as RRGGBB | |
| Led1..Led<count> | <RRGGBB> | Set specific led to desired color RRGGBB |
| Pixels | Show current pixel count | |
| Pixels | <count> | Set amount of pixels in strip or ring up to 512 and reset Rotation |
| Rotation | Show current rotation in pixel count | |
| Rotation | <count> | Set amount of pixels to rotate strip or ring up to Pixels value |
| Scheme | Show current selected scheme | |
| Scheme | 0 | (default) Use a single color for all pixels in light/strip/ring |
| Scheme | 1 | (= Wakeup) Start wake up sequence |
| Scheme | 2 | Cycle through RGB colors using speed option |
| Scheme | 3 | Cycle through RBG colors using speed option |
| Scheme | 4 | Random cycle through colors using speed and fade options |
| Scheme | 5 | Show clock |
| Scheme | 6 | Show incandescent pattern |
| Scheme | 7 | Show RGB pattern |
| Scheme | 8 | Show Christmas pattern |
| Scheme | 9 | Show Hanukkah pattern |
| Scheme | 10 | Show Kwanzaa pattern |
| Scheme | 11 | Show rainbow pattern |
| Scheme | 12 | Show fire pattern |
| SetOption16 | Show LED reverse (clock Scheme) | |
| SetOption16 | 0 | (default) LED clock-wise mode |
| SetOption16 | 1 | Set LED counter-clock-wise mode |
| SetOption20 | 1 / on | Enable changing Dimmer value without turning power on |
| Width(1) | Show current led group width | |
| Width(1) | 0..4 | Set led group width used by Schemes 6 – 12 |
| Width2 | Show current width of the seconds clock hand | |
| Width2 | 0..30 | Set the width of the seconds clock hand |
| Width3 | Show current width of the minutes clock hand | |
| Width3 | 0..30 | Set the width of the minutes clock hand |
| Width4 | Show current width of the hour clock hand | |
| Width4 | 0..30 | Set the width of the hour clock hand |
Die wilde Fahrt geht erst richtig los, wenn man die ganzen Kommados via MQTT steuern kann. Sei es per FHem oder ioBroker.
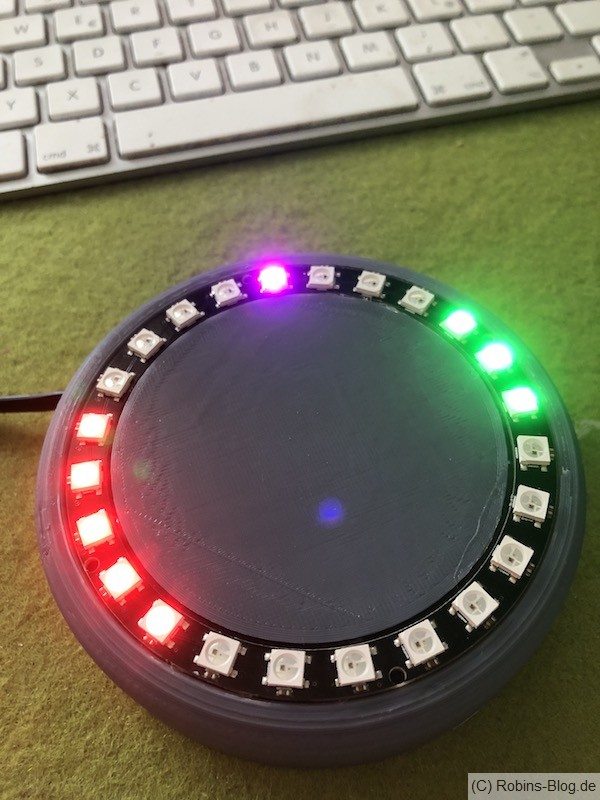
Nun kann man das LED Stripe für unterschiedliche Sachen verwenden.
Beispiele:
- Rotes Licht bei Alarm
- grünes Licht, wenn der 3D-Druck fertig ist
- Lichtfarbe abhängig von der Raumluft-Qualität
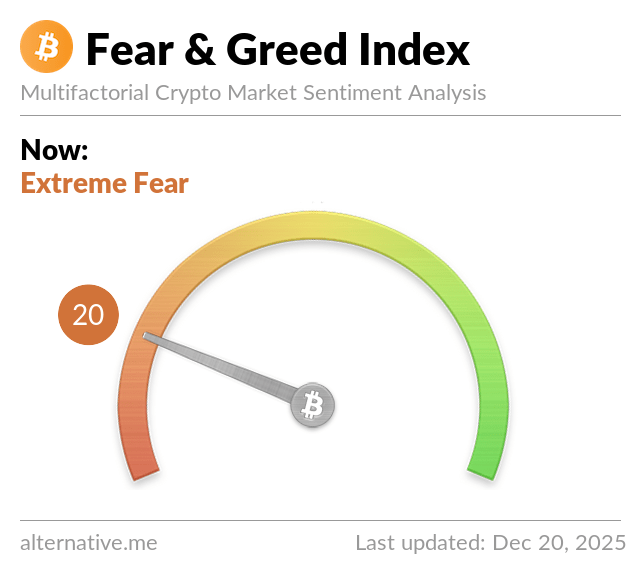
- Grün/ Rotes Licht, wenn der Bitcoin steigt oder fällt
Notwendige Bauteile (amazon-affili):
amazon: LED Ring
amazon: WeMos D1
Kabel
amazon 5 V USB Netzteil
Gehäuse: Thingiverse
Bei Fragen, ab in die Kommentare.


Hallo Leif,
probiere ich aus!!
LG
/robin
Hallo Leif,
sieht gut aus, ist aber wohl was für die LED stripe Meterware, nicht die Platinen-Dinger.
LG
/robin
Wenn man nen 3d Drucker hat ist das Teil ganz Stück, allerdings benötigt man dafür 13 Leds am Strip und nicht als Ring. Da das Teil den Durchmesser eines Echo Dot hat lässt es sich perfekt darunter platzieren.
https://myhub.autodesk360.com/ue297a028/g/shares/SHabee1QT1a327cf2b7aef7834489fe0dc5d?viewState=NoIgbgDAdAjCA0IDeAdEAXAngBwKZoC40ARXAZwEsBzAOzXjQEMyzd1C0B2AM1wGMI3AKwAjALS4AbABYAzGOlCAnAA4xI4dLEQATMMk6lfRrhUQ0AXxABdIA
Ich verwende für meine WS2812B Projekte gern McLighting. Das hat bereits massig fertige Effekte an Board, aber es kann dort ebenfalls jede LED einzeln getriggered werden. Auf Wunsch werden neben eigenem lokalen Webinterface auch MQTT, AMQTT und HomeAssistant unterstützt.
https://github.com/toblum/McLighting